上一篇文章开发了后端与 PowerPoint 的交互功能。下面我们来创建一个前端界面,使加载项对用户更加友好。
定义章节 首先我们来解决前端最关键的问题,就是让用户可以输入对章节的定义。
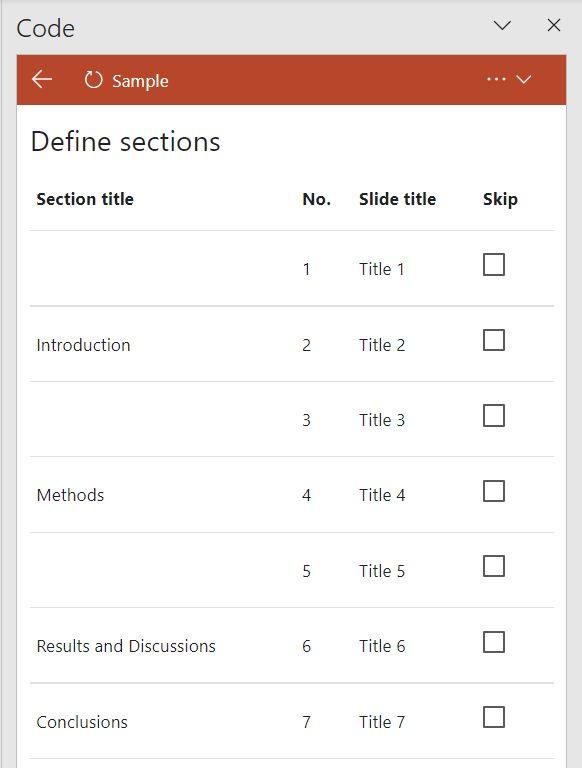
在 LaTeX beamer 中可以在两个幻灯片之间的位置输入 \section{} 来定义节,而在 PowerPoint 中不支持这种两个幻灯片之间的位置。因此我这里建立一个表格来进行输入,表格分为四列,第一列是 Section title ,由用户输入。第二列是 Slide number,第三列是 Slide title。这两列的数据从 ppt 中读取。这样用户只需要在每一章节起始页对应的表格位置输入一个 Section title ,就可以定义整个文档的分节了。最后一列设计了一个复选框,标题为 Skip ,表示创建导航栏时是否跳过这一页。
设计输入表格 尽管我们的前端现在还不算复杂,但是等到功能有所扩充之后,要输入的数据量比较多,而且形式复杂。因此,仅使用 jQuery 实现起来比较困难,这里我们使用一个前端框架 Vue3 来帮助我们创建前端。 Vue 的好处在于它是一个渐进式的框架,可以不用构建工具,直接注入现有的页面中。因此即使使用 Vue 这种前端框架,我们仍然可以在 Script Lab 加载项中直接写代码。这里我们使用一个 <div> 把整个前端页面包裹起来,并把它的 id 命名为 “navbar-app” 。然后在 JavaScript 中挂载 Vue 。代码如下:
1
2
3
4
5
6
7
8
9
10
11
12
const {createApp} = Vue;createApp({ data ( return { slideSectionTitles : ["" , "Introduction" , "" , "Methods" , "" , "Results and Discussions" , "Conclusions" ], slideTitles : Array (7 ).fill(0 ).map((_, i ) => `Title ${i+1 } ` ), slideSkipped : Array (7 ).fill(false ), slideCount : 7 , } } }).mount('#navbar-app' );
注意要在 Libraries 窗体中引入 Vue3:
1 https://unpkg.com/vue@3/dist/vue.global.js
同时,我们还需要一个前端 CSS framework ,也就是预定义好的一套视觉样式。这样可以大大简化对前端 CSS 的设置。Office 默认使用的 Fabric UI 已经升级为 Fluent UI 。这套 UI 是针对原生 React 应用而设计的,如果不使用 React 来创建前端的话使用起来比较困难。因此我们这里放弃使用 Fabric UI ,改用符合 Google 开发的 Material design 设计原则的一个 CSS framework 叫做 Materialize 。在 Libraries 里面引入 Materialize 需要的 CSS 和 JS 库:
1
2
https://cdnjs.cloudflare.com/ajax/libs/materialize/1.0.0/css/materialize.min.css https://cdnjs.cloudflare.com/ajax/libs/materialize/1.0.0/js/materialize.min.js
然后就可以定义前端界面了,代码如下:
1 2 3 4 5 6 7 8 9 10 11 12 13 14 15 16 17 18 19 20 21 22 23 24 25 26 27 28 <div id ="navbar-app" > <div class ="row" > <div class ="col s12" > <h5 > Define sections</h5 > <table > <thead > <tr > <th > Section title</th > <th > No.</th > <th > Slide title</th > <th > Skip</th > </tr > </thead > <tbody > <tr v-for ="n in slideCount" > <td > <div contenteditable v-html ="slideSectionTitles[n-1]" @blur ="slideSectionTitles[n-1]=$event.target.innerHTML;" > </div > </td > <td > {{ n }}</td > <td > {{ slideTitles[n-1] }}</td > <td > <label > <input :id ="'skip-' + n" type ="checkbox" v-model ="slideSkipped[n-1]" /> <span > </span > </label > </td > </tr > </tbody > </table > </div > </div > </div >
这里有一个 trick ,使用了 <div> 的 contentEditable 功能来实现表格元素的编辑。该标签中的 html 与 Vue 的 data 建立关联。然后指定一个失焦后的事件 @blur ,并把目前编辑的文字保存在 slideSectionTitles 的相应位置。值得一提的是,更好的方式是使用 <input> 来完成这个工作,但是我们这里为了快速创建原型,就选择了使用这种最简单的方式。
现在运行,就可以看到我们定义的表格了,如下图所示。
读取文档信息 现在的前端界面中仅实现了数据模型,表格的内容暂时还没有从文档中加载,而是使用的伪数据。这里我们把与 PowerPoint 的交互放在 Vue 的外面,尽量做到把前端与后端分离。在 Vue 外面定义以下函数:
1
2
3
4
5
6
7
8
9
10
11
12
13
14
15
16
17
18
19
20
21
22
23
24
25
26
async function readPresentationProp ( return await PowerPoint.run(async (context) => { const slideCounter = context.presentation.slides.getCount(); const slides = context.presentation.slides.load("items/id" ); await context.sync(); const slideCount = slideCounter.value; const slideIds = slides.items.map((slide ) => slide.id); const shapesList = slideIds.map((id ) => { return context.presentation.slides.getItem(id).shapes.load("items/name, items/textFrame/textRange/text" ); }); await context.sync(); const slideTitles = shapesList.map((shapes ) => { for (let item of shapes.items) { if (item.name.startsWith("Title" )) { return item.textFrame.textRange.text; } } return "" ; }); const tag = context.presentation.tags.getItemOrNullObject("NAVBAR" ); tag.load("value" ); await context.sync(); const savedData = tag.isNullObject ? tag : JSON .parse(tag.value); return { slideCount, slideIds, slideTitles, savedData }; }); }
以上代码中,首先使用 slides 中的 getCount() 来获取页面数。在与 PowerPoint 交互时基本是异步完成的,所以这个方法不能直接获得到一个数字,而是返回一个 Promise ,然后异步调用 context.sync() 之后,这个 Promise 才会得到解决,即返回一个对象,这个对象的 value 属性就是页面的数量。
同理,在获取其他属性的时候,也需要类似地异步加载,可以使用 load 方法进行加载,否则不会获取任何属性。该方法的参数就是需要获取的属性。这个属性不仅仅可以使用当前对象的顶层属性,还可以通过一个成为导航属性的方式获取深层的属性,导航之间可以用 / 或 . 分隔,但是经过测试有些时候 . 没有效果,所以推荐使用 / 。然后使用 context.sync() ,再访问获取的属性。
我们获取了每一页的所有 Shapes 的 name 属性。在 PowerPoint 中会自动为添加的 shape 赋予 name 属性。在默认的模板中,标题的 name 属性是以 Title 开头的。所以使用这种方式来确定幻灯片的 title 。这里要注意的是用户必须使用版式中的 Title 栏来建立 title 时才可以获取到,如果是使用自行创建的文本框来作为 title 的话是无法识别的。然后为了获取 title 的文字,先要获取 textFrame ,即图形中保存文字的地方。再获取 textRange ,即所有的文字。最后再获取 text 就可以了。
slideId 是指 PowerPoint 为每一个页面都会创建一个用字符串表示的 id ,它与页面一一对应。如果使用序号来表达页面,在插入和删除之后,页面的序号是会变化的 ,但是 id 就不会变化。读取这个 id 可以更准确地建立页面与章节的对应关系,我们在后面会用到。
tag 是一个多数对象都有的属性,它是一个键值对,键和值都是文本类型。这里我们从 presentation ,也就是整个文档中建立一个键名为 NAVBAR 的键值对,其值用于保存我们的加载项中所设置的全部数据。这样用户的设置可以保存在文档中,不用每一次都重新输入了。它的实现方法会在后面介绍。当前文档中尚无 NAVBAR 这个 tag ,会返回一个具有 isNullObject 属性的对象,在前端加以处理即可。
将读取的信息加载到前端 下面我们在 Vue 中定义一个函数 load() ,用于初始化 Vue 中的数据。再在 Vue 的 mount() 中调用这个函数。并把 data 中的伪数据改为初始化数据。代码如下:
1
2
3
4
5
6
7
8
9
10
11
12
13
14
15
16
17
18
19
20
21
22
23
24
25
26
27
28
29
30
{ data ( return { slideSectionTitles : [], slideTitles : [], slideSkipped : [], slideCount : 0 , } }, methods : { load ( readPresentationProp() .then((res ) => { this .slideTitles = res.slideTitles; this .slideIds = res.slideIds; this .slideCount = res.slideCount; if (res.savedData.isNullObject) { this .slidesectionTitles = Array (res.slideCount).fill("" ); this .slideSkipped = Array (res.slideCount).fill(false ); } }) .catch((reason ) => { console .log(reason); }); }, }, mounted ( this .load(); }, }
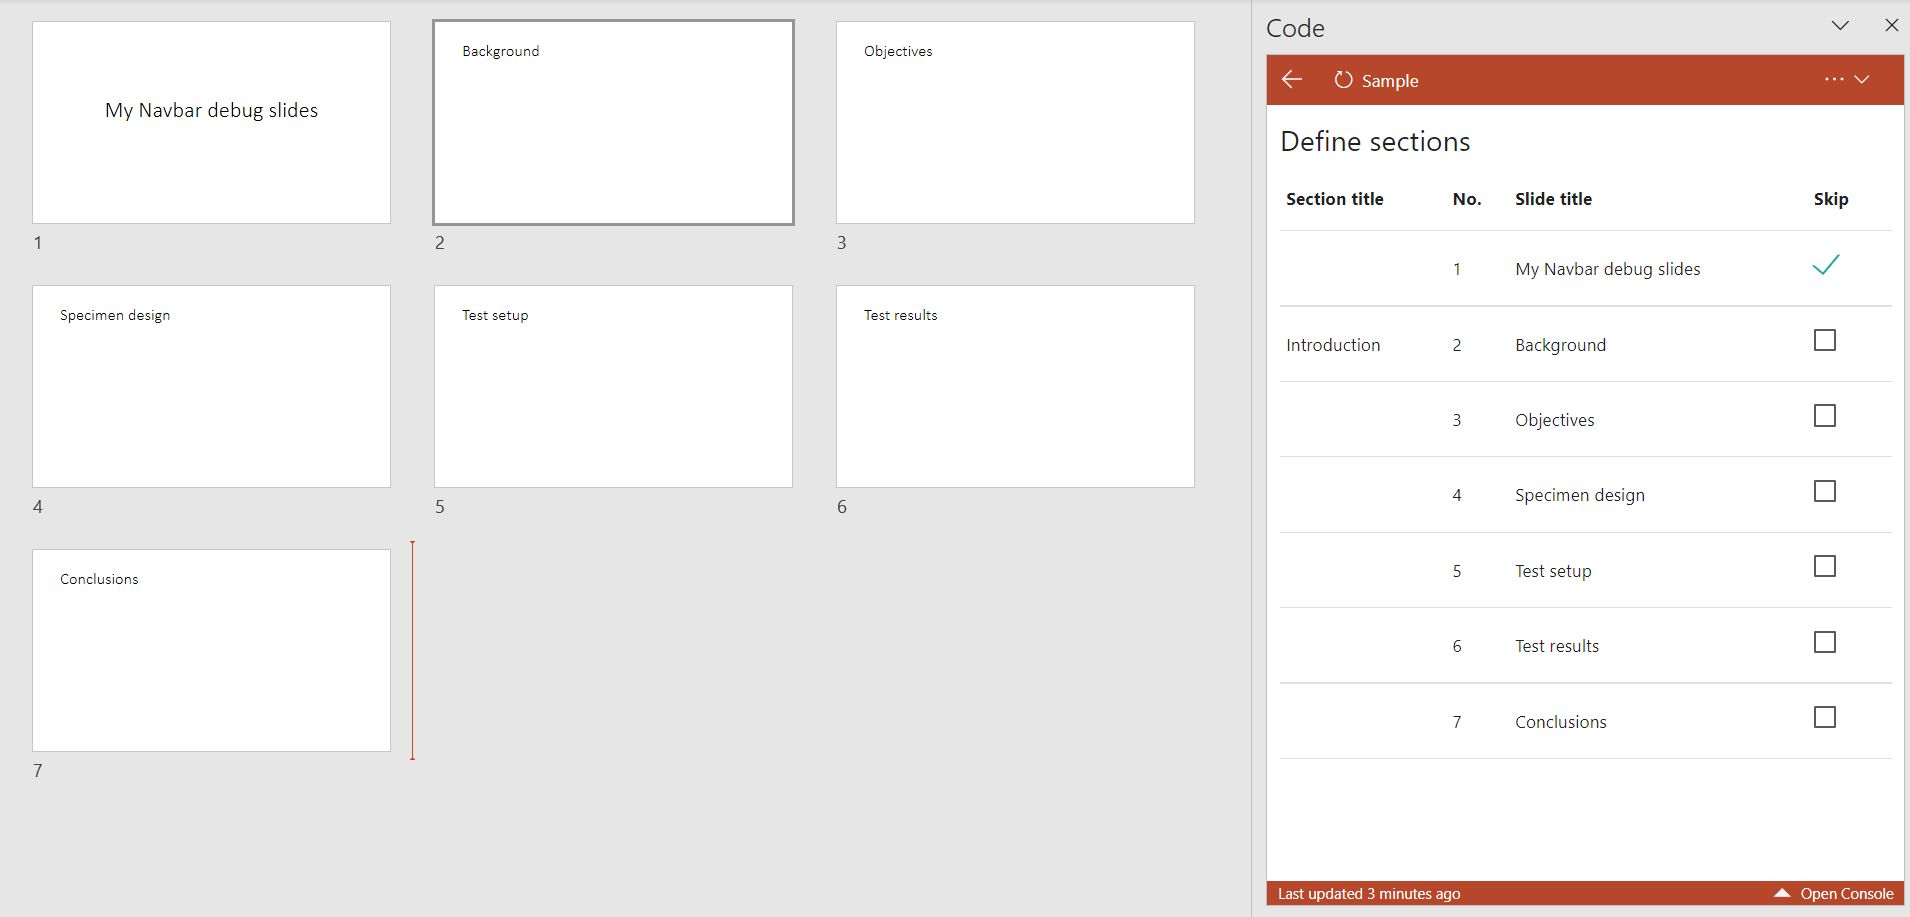
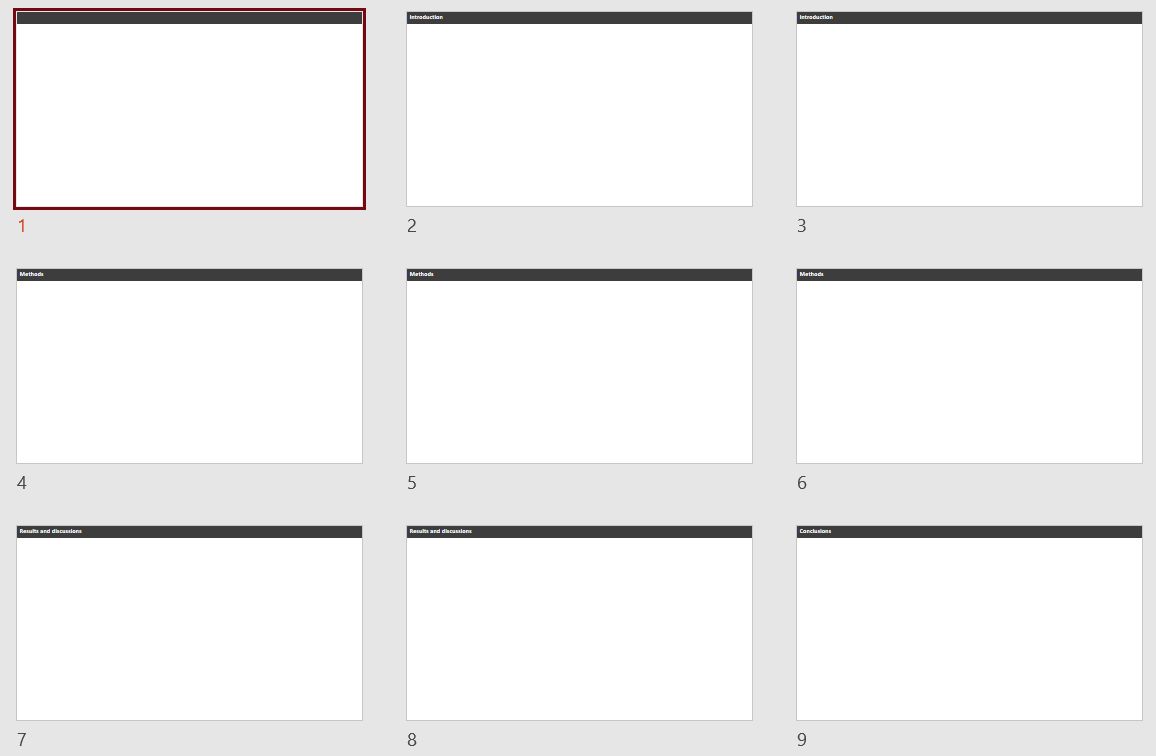
然后我们建立一些幻灯片用来测试。这里创建 7 页,把标题分别设为:
1
2
3
4
5
6
7
My NavBar debug slides Background Objectives Specimens Test setup Test results Conclusions
然后运行加载项,会发现前端表格已经建好了,并且可以在 Section title 一栏输入章节名。如下图所示:
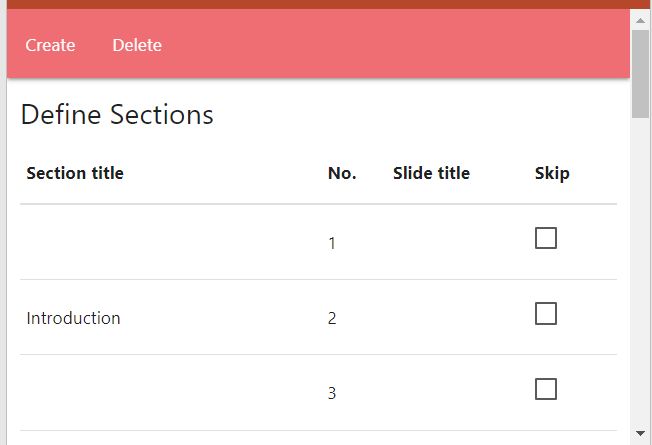
创建按钮栏 下面来创建一个按钮栏,把所需要执行的操作合并在一个悬浮在加载项视窗顶部的工具栏中。这里使用 Materialize 的导航栏功能实现。
1 2 3 4 5 6 7 8 <nav > <div class ="nav-wrapper" > <ul id ="nav-mobile" class ="left" > <li > <a href ="#" @click ="create" > Create</a > </li > <li > <a href ="#" @click ="deleteAll" > Delete</a > </li > </ul > </div > </nav >
这里 Create 和 Delete 两个按钮与 Vue 的 create() 方法和 deleteAll() 方法绑定。因此在 Vue 中,需要建立这些方法:
1
2
3
4
5
6
7
8
9
10
{ methods : { create ( createSectionBar(defaultSectionBarConfig()); }, deleteAll ( deleteAllNavbarShapes(); }, }, }
可以看到我们创建的导航栏如下:
点击按钮,可以看到在文档中生成了导航栏,但是使用的数据是 defaultSectionBarConfig() 返回的数据,与当前文档中的数据无关。下面我们来建立当前文档中章节和页面数据,并传递给 createSectionBar() 。
创建配置数据模型 根据后端接口定义的 sectionBarConfig 数据模型,在 Vue 中增加一些数据如下:
1
2
3
4
5
6
7
8
9
10
11
12
13
14
15
16
{ data : { return { sectionBar : { docking : "Top" , distribution : "EqualSpacing" , edgeOffset : 0 , startOffset : 0 , endOffset : 0 , activeFormat : defaultActiveFormat(), inactiveFormat : defaultInactiveFormat(), width : 30 } } } }
以上数据就是所需要增加的 sectionBarConfig 的全部配置数据。但是数据模型还需要一些其他全局的数据,是没有直接在 data 中定义的,比如 slideSectionIds 这个数组保存的是每一页对应的章节序号。但是 data 中没有保存这个信息。而这个信息可以从 slideSectionTitles 里面计算出来。因此我们用一个 computed 属性来计算这个值。还有所有章节名的数组 sectionTitles ,也可以这样获取。另外对于全套的 sectionBarConfig 也使用 computed 属性来计算。
1
2
3
4
5
6
7
8
9
10
11
12
13
14
15
16
17
18
19
20
21
22
23
24
25
26
27
28
29
30
31
32
33
34
35
36
37
38
39
{ computed : { slideSectionIds ( let currentId = -1 ; return Array (this .slideCount) .fill(0 ) .map((_, i ) => { if (this .slideSkipped[i]) { return -1 ; } else { if (this .slidesectionTitles[i] !== "" ) { currentId += 1 ; } return currentId; } }); }, sectionTitles ( let sectionTitles = []; let currentsectionTitle = "" ; for (let i = 0 ; i < this .slideCount; i++) { if (this .slidesectionTitles[i] !== "" && this .slidesectionTitles[i] != currentsectionTitle) { currentsectionTitle = this .slidesectionTitles[i]; if (currentsectionTitle != "" ) { sectionTitles.push(currentsectionTitle); } } } return sectionTitles; }, sectionBarConfig ( return { ...this.sectionBar, sectionTitles : this .sectionTitles, slideSectionIds : this .slideSectionIds }; }, } }
下面就可以将 computed 计算的数据传入 method 中了:
1
2
3
4
5
6
7
{ methods : { create ( createSectionBar(this .sectionBarConfig); }, } }
再次运行,可以发现,生成的章节导航栏与表格中的定义一致了。
测试的方法 在写上述代码的过程中,一般不是一下子就可以运行得通,经常会出现各种各样的 bug ,所以需要进行测试。
首先,控制台打印是最简便的测试方法。比如我们写的 create() 方法,对异常没有进行任何处理,这样如果出现了异常,我们并不知道。而如果用先前模板中的 tryCatch() 函数来包裹里面的异步函数的话,就可以把异常在控制台打印出来了:
1
2
3
4
5
6
7
{ methods : { create ( tryCatch(() => {createSectionBar(this .sectionBarConfig)}); }, } }
这只是临时的打印,仅开发调试使用。在生产环境中,要在出现异常的位置加上用户提示,以期用户可以解决异常。
对于 Vue 的传值,在普通的浏览器测试中,可以把 this 暴露在全局环境中。这样使用浏览器提供的开发者模式就可以很方便地查看 Vue 的数据了:
1
2
3
4
5
{ mounted ( window .VueData = this ; } }
但是如果是使用 Script Lab ,它的浏览器功能有限,没有开发者模式。这时,可以创建一个按钮,并绑定一个 log() 方法,在 log() 方法中可以使用 console.log() 打印所需要观察的数据。这样就可以了解现在 Vue 中数据的实际值了。
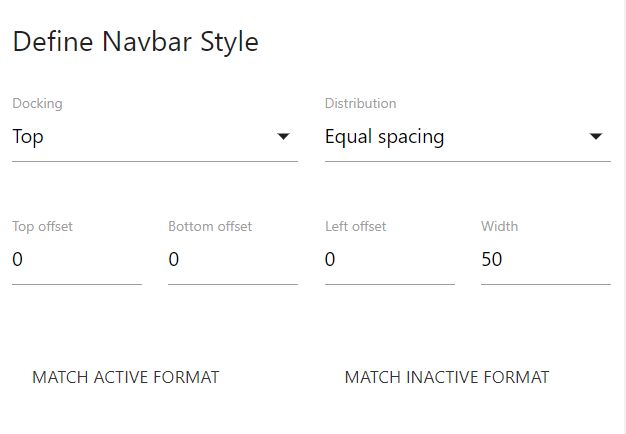
输入配置参数 上面虽然可以创建导航栏,但是使用的配置都是默认值,还不能调整。下面我们来创建一个前端页面来让用户输入导航栏的配置参数:
1 2 3 4 5 6 7 8 9 10 11 12 13 14 15 16 17 18 19 20 21 22 23 24 25 26 27 28 29 30 31 32 33 34 35 36 37 38 39 40 41 42 43 44 45 46 47 48 49 50 <div class ="row" > <div class ="col s12" > <h6 > Define Navbar style</h6 > </div > <div class ="input-field col s6" > <select v-model ="sectionBar.docking" > <option > Left</option > <option > Top</option > <option > Right</option > <option > Bottom</option > </select > <label > Docking</label > </div > <div class ="input-field col s6" > <select v-model ="sectionBar.distribution" > <option value ="EqualSpacing" > Equal spacing</option > <option value ="Uniform" > Uniform</option > <option value ="SlideNumber" > Slide number</option > </select > <label > Distribution</label > </div > </div > <div class ="row" > <div class ="input-field col s3" > <input id ="sectionBarStartOffset" type ="text" class ="validate" v-model.number ="sectionBar.startOffset" > <label for ="sectionBarStartOffset" > {{ (sectionBar.docking === 'Left' || sectionBar.docking === 'Right') ? 'Top offset' : 'Left offset' }}</label > </div > <div class ="input-field col s3" > <input id ="sectionBarEndOffset" type ="text" class ="validate" v-model.number ="sectionBar.endOffset" > <label for ="sectionBarEndOffset" > {{ (sectionBar.docking === 'Left' || sectionBar.docking ==='Right') ? 'Bottom offset' : 'Right offset' }}</label > </div > <div class ="input-field col s3" > <input id ="sectionBarEdgeOffset" type ="text" class ="validate" v-model.number ="sectionBar.edgeOffset" > <label for ="sectionBarEdgeOffset" > {{ sectionBar.docking === 'Left' ? 'Left offset' : sectionBar.docking === 'Right' ? 'Right offset' : sectionBar.docking === 'Bottom' ? 'Bottom offset' : 'Top offset' }}</label > </div > <div class ="input-field col s3" > <input id ="sectionBarWidth" type ="text" class ="validate" v-model.number ="sectionBar.width" > <label for ="sectionBarWidth" > {{ (sectionBar.docking === 'Left' || sectionBar.docking === 'Right') ? 'Width' : 'Height' }}</label > </div > </div > <div class ="row" > <div class ="input-field col s6" > <a class ="waves-effect btn-flat" @click ="matchSelectedTextboxFormat(true)" > Match active format</a > </div > <div class ="input-field col s6" > <a class ="waves-effect btn-flat" @click ="matchSelectedTextboxFormat(false)" > Match inactive format</a > </div > </div >
这里一共设计了三行。第一行用于选择导航栏的停靠位置和分布方式,与后端接口中的类型保持一致。第二行用于定义导航栏的一些尺寸数据。这里使用的是文本框输入。其实使用 slider 是更好的选择。这个我们在后期处理细节时再视情况调整。第三行设计了两个 flat button ,用于读取页面中的文本框格式信息。前两行都是使用 v-model 直接与 Vue 的 data 中的数据双向绑定的,不需要其他设置了。最后一行的两个按钮绑定了一个方法 matchSelectedTextboxFormat() 这里我们要在 Vue 中添加一个方法来实现:
1
2
3
4
5
6
7
8
9
10
11
12
13
14
{ methods : { matchSelectedTextboxFormat (isActive ) readSelectedTextboxFormat() .then((format ) => { if (isActive) { this .sectionBar.activeFormat = format; } else { this .sectionBar.inactiveFormat = format; } }); }, } }
这个方法读入一个参数 isActive ,如果是 true 就代表设置当前 section 的样式。否则设置非当前 section 的样式。以上设置完成后的界面如下图所示。
现在点击 Create 按钮,发现已经可以正常使用了。
刷新和保存 构建保存所需数据 用户会不断地编辑自己的 ppt ,这就会导致 ppt 中的信息发生变化。在变化之后,需要在插件中进行刷新操作。这里我们不需要插件实时地跟进 ppt 的变化,而是仅仅在用户重新打开插件,或者是点击一个刷新按钮之后,再触发同步 ppt 的变化的操作即可。
前面也提到过,如果页面的顺序或数量发生了变化,按页面顺序保存的节标题信息就会错乱。解决这一问题的方法,是把每一节最开始的那一页与节的标题一一对应起来,而且这个对应关系不受幻灯片排序的影响。这时我们就要用的页面的 id 。这个 id 是 PowerPoint 使用特殊编码规则创建的一个独一无二的字符串,无论页面的顺序如何变化,页面对应的 id 是不会变化的。因此使用页面的 id 而不是顺序编号的数字来对应起始节的标题是更符合逻辑的。这里我们创建一个 computed 值,名为 slideIdToSectionName ,虽然命名比较长,但是非常容易理解。它是一个 object ,键为页面的 id ,而值为用户在表格中输入的节标题。代码如下:
1
2
3
4
5
6
7
8
9
10
11
12
13
{ computed : { slideIdTosectionTitle ( let res = {}; this .slidesectionTitles.map((name, i ) => { if (name !== "" ) { res[this .slideIds[i]] = name; } }); return res; }, } }
这里面使用了 slideIds 这一数据,已经在 readPresentationProp() 中读取,并且在 load() 方法中读入了 Vue 的 data 中。
同理,对于要跳过的页面,也不且直接使用顺序保存,同样也构建一个对象,把需要跳过的页面 id 作为键来保存:
1
2
3
4
5
6
7
8
9
10
11
12
13
{ computed : { slideIdSkipped ( let res = {}; for (let i = 0 ; i < this .slideSkipped.length; i++) { if (this .slideSkipped[i]) { res[this .slideIds[i]] = true ; } } return res; } } }
除了章节的定义之外,还要把 sectionBar 里面的配置项加以保存。这里我们再构建一个 computed 数据,命名为 saveData ,用于组装要保存的对象。
1
2
3
4
5
6
7
8
9
10
11
{ computed : { saveData ( return { slideIdTosectionTitle : this .slideIdTosectionTitle, slideIdSkipped : this .slideIdSkipped, sectionBar : this .sectionBar, }; }, } }
将数据保存在 Tag 中 现在我们来把这个数据保存起来,在 Vue 之外建立一个 saveToTag() 函数,用于与 PowerPoint 的通信,代码如下:
1
2
3
4
5
6
async function saveToTag (data ) await PowerPoint.run(async (context) => { context.presentation.tags.add("NAVBAR" , JSON .stringify(data)); await context.sync(); }); }
它的逻辑很简单,就是把要保存的数据 data 转化为 JSON 格式,然后储存在 presentation 的 tags 里面建立的一个 NAVBAR 标签中。这样,可以在加载时,读取这个标签,再转化回前端表格的数据格式。这个保存的数据已经在前面的 readPresentationProp() 函数里面进行了读取。这里值得注意的是,如果打开的 ppt 文件从来没有运行过这个插件,则没有保存名为 NAVBAR 的标签。这时获取该标签时,如果使用 getItem() 方法会报错,需要进行错误处理。但是 API 还提供了一个方法 getItemOrNullObject() 。如果没有标签,会返回一个具有 isNullObject 属性的对象,这样就不需要用错误处理了。如果是这样我们直接把这个对象返回。否则则使用 JSON.parse 来解析我们存储的对象。
下面我们在 Vue 中创建一个 save() 方法,用来定义要存储的数据,并且调用后端的 saveToTag() 方法进行保存。代码如下:
1
2
3
4
5
6
7
8
9
10
{ methods :{ save ( saveToTag(this .saveData) .then(() => { console .log("Save successful!" ); }); }, } }
读取保存的数据 在前文中,建立了 load() 方法,已经加载了 NAVBAR 标签中的数据。但是只定义了当数据返回带有 isNullObject 属性的对象时,要进行的初始化处理。现在我们来实现数据的读取。
首先是要把用 JSON 字符串保存的数据解析为对象形式。然后需要注意的是,我们使用了两个对象,都是将页面的 id 映射到所需要的值。 这两个对象都是使用 computed 计算得到的,并不能直接赋值到 Vue 的 data 中。这时就需要对它进行解析,把它变回 Vue data 模型里面所需要值:
1
2
3
4
5
6
7
8
9
10
11
12
13
14
let { slideIdTosectionTitle, slideIdSkipped } = res.savedData;let slidesectionTitles = Array (res.slideCount).fill(0 ).map(() => "" );for (let i = 0 ; i < res.slideCount; i++) { if (slideIdTosectionTitle[res.slideIds[i]] != undefined ) { slidesectionTitles[i] = slideIdTosectionTitle[res.slideIds[i]]; } } this .slidesectionTitles = slidesectionTitles;this .slideSkipped = this .slideIds.map((id ) => { return slideIdSkipped[id] !== undefined ? true : false ; });
绑定事件 这里我们为了刷新,先使用 save() 方法保存数据,再使用 load() 方法重新从 ppt 文件中同步数据过来,就完成了一次刷新。另外我们希望用户不需要显式地进行保存,因此在 create() 之后,以及 Vue 的 beforeDestroy() 方法中,都调用 save() 方法,使数据能够及时保存。
1
2
3
4
5
6
7
8
9
10
11
12
13
14
15
{ methods : { create ( this .save(); }, refresh ( this .save(); this .load(); } }, beforeDestroy ( this .save(); } }
提升用户体验 经过以上的处理,用户已经可以通过前端来定义整个 sectionBar 的配置数据了。下面我们在细节上再进行一些处理,使用户体验更好。
添加工具提示 有一些按钮虽然已经定义好了,但是用户不一定可以完全理解它的功能。这时就需要添加一些提示。比如 “Match active format” 按钮,需要提前选中一个文本框。这里我们就给它添加一个工具提示。这里可以通过 Materialize CSS 框架提供的 javascript 来实现。把这个按钮的 html 改为:
1 <a class ="waves-effect btn-flat tooltipped" data-position ="top" data-tooltip ="Select a textbox first" @click ="matchSelectedTextboxFormat(true)" > Match active format</a >
然后在 methods 中添加一个方法,initMaterialize() 用来初始化所有的控件。最后在 Vue 的 mounted() 函数中调用这个方法:
1
2
3
4
5
6
7
8
9
10
11
{ methods : { initMaterialize ( M.Tooltip.init(document .querySelectorAll(".tooltipped" )); } }, mounted ( this .initMaterialze(); this .load(); } }
这样,按钮的 tip 就可以自动跳出来了。
加载中禁用 由于加载项与 PowerPoint 的交互是需要时间的,因此在交互的过程中,我们不希望用户去操作加载项,从而防止产生没有处理的异常。因此,需要一个“加载中”的提示,并且禁用加载项的所有功能。直到加载完毕,再恢复功能。
它的实现方式很简单,就是在加载项的上部覆盖一个半透明的遮罩层,然后放进去一个代表 loading 的图标。这个遮罩层在同步的时候显示,而同步完毕后隐藏。
为了实现,我们先写一个遮罩层:
1 2 3 4 5 6 7 8 9 10 11 12 13 14 15 <div class ="preloader-mask" v-if ="isSyncing" > <div class ="preloader-wrapper big active" > <div class ="spinner-layer spinner-blue-only" > <div class ="circle-clipper left" > <div class ="circle" > </div > </div > <div class ="gap-patch" > <div class ="circle" > </div > </div > <div class ="circle-clipper right" > <div class ="circle" > </div > </div > </div > </div > </div >
这里面的 spinner 是 Materialize 提供的,只要把代码复制过来即可。然后设置一下它的 CSS :
1
2
3
4
5
6
7
8
9
10
11
12
13
14
15
16
17
18
19
.preloader-mask { position : absolute; top : 0 ; left : 0 ; width : 100% ; height : 100% ; background-color : whitesmoke; opacity : 0.5 ; text-align : center; } .preloader-mask .preloader-wrapper { position :absolute; top : 0 ; left : 0 ; right : 0 ; bottom : 0 ; margin : auto; }
在 html 中还注意到,这个 mask 中使用 v-model 与 isSyncing 绑定。也就是说,在 Vue 中定义了一个 isSyncing 变量,如果它是 true ,这个 mask 就会展示出来。否则它就会隐藏:
1
2
3
4
5
6
7
{ data ( return { isSyncing : false , } } }
下面我们来修改 create() 方法:
1
2
3
4
5
6
7
create ( this .syncing = true ; createSectionBar(this .sectionBarConfig) .then(() => { this .syncing = false ; }) }
通过这样一个简单的方式就可以实现遮罩层的控制。对于其它需要与 PowerPoint 交互的操作,也可以添加这个 loading 提示。
成功和异常提示 Materialze 提供了 toast 功能,用来弹出一个自动关闭的提示框。这里我们使用 toast 功能来进行成功与异常的提示。
这里仍然以 Create 按钮的点击为例。我们希望创建完成之后,弹出一个 toast 框来提示创建成功,并且已经保存。如果用户没有定义 section title 就来点击创建按钮,那就需要提示用户先定义,再创建。下面我们进行如下修改:
1
2
3
4
5
6
7
8
9
10
11
12
13
14
15
16
17
18
19
20
21
{ methods : { toastSuccess (message ) M.toast({ html : message, classes : "green darken-4" }); }, toastFailure (message ) M.toast({ html : message, classes : "red darken-4" }); }, create ( this .syncing = true ; createSectionBar(this .sectionBarConfig) .then(() => { this .syncing = false ; M.toastSuccess("OK! Configuration is saved." ); }).catch((reason ) => { this .syncing = false ; M.toastFailure(reason.message); }) } } }
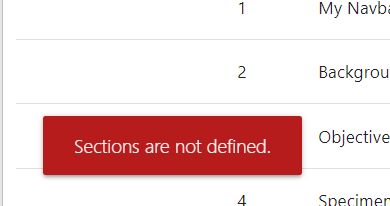
这里创建了两个方法: toastSuccess() 和 toashFailure() 分别用于对成功和异常的处理。然后在回调函数中就可以调用这些方法弹出 toast 框了。在其他函数中需要添加对 Error 的触发。这里我们在 createSectionBar() 函数中,可以判断一下 sectionNames 的长度:
1 2 3 4 5 if (sectionNames.length === 0 ) { throw new Error ("Sections are not defined" ); }
这样,如果用户什么都不设置就点击 Create 按钮,就会出现下图所示的提示:
其他一些需要设置的细节这里就不再赘述了。
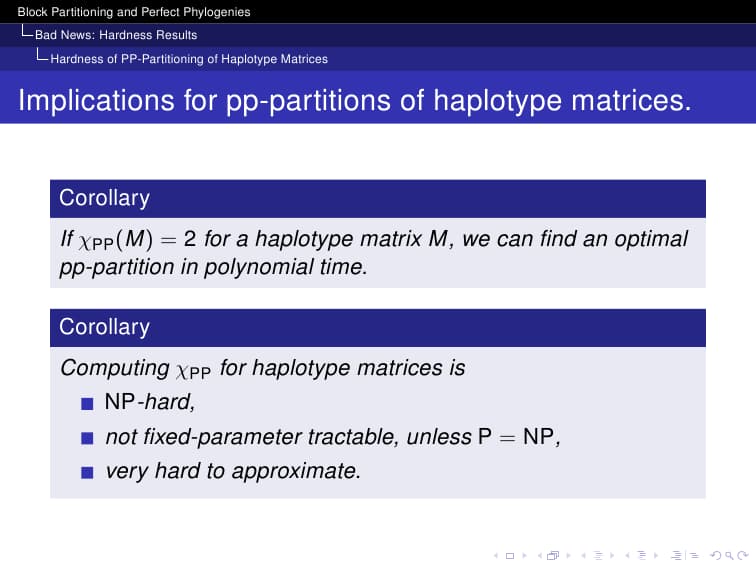
隐藏非当前的章节 有的时候我们不需要显示非当前章节。尽管这时已经不是严格意义上的 Navbar 了,但是在 LaTeX 的很多主题,如下图所示的 Antibes 中,是用这样的方式来显示的,也是一种不错的选择。本节我们就对前的的代码加以修改,以实现隐藏非当前章节的功能。
创建函数 由于隐藏非当前章节后,计算的逻辑非常简单,所以我们不需要先算 Prop 再来根据 Prop 创建了,直接写一个 createSectionBarHideInactive() 函数实现这一功能即可。代码如下:
1
2
3
4
5
6
7
8
9
10
11
12
13
14
15
16
17
18
19
20
21
22
23
24
25
26
27
28
29
30
async function createSectionBarHideInactive (sectionBarConfig ) const { sectionTitles, slideSectionIds, edgeOffset, startOffset, endOffset, width, docking, activeFormat } = sectionBarConfig; let prop; if (docking === 'Left' || docking === 'Right' ) { prop = { width : width, height : SLIDEHEIGHT - startOffset - endOffset, left : (docking === 'Left' ) ? edgeOffset : SLIDEWIDTH - edgeOffset - width, top : startOffset, } } else if (docking === 'Top' || docking === 'Bottom' ) { prop = { width : SLIDEWIDTH - startOffset - endOffset, height : width, left : startOffset, top : (docking === 'Top' ) ? edgeOffset : SLIDEHEIGHT - width - edgeOffset } } else { throw new Error (`Invalid docking ${docking} ` ); } await PowerPoint.run(async context => { slideSectionIds.map((id, n ) => { const shapes = context.presentation.slides.getItemAt(n).shapes; const shape = shapes.addTextBox(sectionTitles[id], prop); setTextboxFormat(shape, activeFormat); shape.name = `NavbarSectionTextbox-${n} ` ; }) await context.sync(); }) }
修改配置数据的格式 我们把是否只显示活动的章节名作为一项配置数据加入到 sectionBarConfig 的定义中。即添加一个属性 showActiveOnly 。然后在 createSectionBar() 函数中加入对它的处理。
1
2
3
4
5
6
7
8
9
{ data ( return { sectionBar : { showActiveOnnly : false , } } } }
1
2
3
4
5
6
7
async function createSectionBar ( if (sectionBarConfig.showActiveOnly) { createSectionBarActiveOnly(sectionBarConfig); return } }
修改前端 在前端中,需要增加一个选项,来询问用户是否只建立活动章节名。这里我们使用一个 checkbox 来实现。
1 2 3 4 5 6 7 8 9 10 <div class ="row" > <div class ="col s12" > <p > <label > <input type ="checkbox" v-model ="sectionBar.showActiveOnly" /> <span > Show active section only </span > </label > </p > </div > </div >
试着将这一选项打勾,来看生成的效果:
使用匹配的方式来定义尺寸 前面的数据模型中,是使用四个参数 edgeOffset startOffset endOffset width 再配合上 docking 来定义导航栏的位置的。但是用户对这些数字的单位很大可能是没有概念的。因此这样定位很难让用户一下子搞清楚究应该输入哪些数字。
在设置文本框的格式时,我们使用了匹配现有文本框的方式,使大量参数可以通过图形化的方式来赋值。这种操作给了我们启发:对于导航栏也可以使用图形化的定义方式。我们只需要让用户用一个矩形把想要导航栏的位置框起来,然后读取这个矩形的信息,就可以定义这些数字了。
我们现有 readSelectedShapeFormat() 函数就可以读取到这些信息。这里我们只要加以利用,就可以获取上面定义的这些参数值了。现在来在 Vue 中写一个由读取的矩形数据来计算 SectionBarConfig 值的方法 loadSectionBarRange() ,并且在数据 data 中加一个 sectionBarRange 对象来保存所读取的对象。不直接计算成 sectionBar 对象是因为其他属性有可能后期还会修改,所以这个对象里面的 edgeOffset startOffset endOffset width 四个属性就不再需要了,可以解除与前端控件的绑定,并去掉这些属性。而后端的模型还是需要这些数据的,我们实现这个需求时尽量不去影响后端,所以在 computed 计算 sectionBarConfig 时把这几个属性给计算出来。
1
2
3
4
5
6
7
8
9
10
11
12
13
14
15
16
17
18
19
20
21
22
23
24
25
26
27
28
29
30
31
32
33
34
35
36
37
38
39
40
41
42
43
44
45
46
47
48
49
50
51
52
53
54
55
56
57
58
59
60
{ data ( return { sectionBar : { docking : "Top" , distribution : "EqualSpacing" , activeFormat : defaultActiveFormat(), inactiveFormat : defaultInactiveFormat(), showActiveOnly : false , }, sectionBarRange : { direction : "Horizontal" , width : 960 , height : 30 , left : 0 , top : 0 , } } }, methods : { loadSectionBarRange ( readSelectedShapeFormat() .then(format => this .sectionBarRange.width = format.width; this .sectionBarRange.height = format.height; this .sectionBarRange.left = format.left; this .sectionBarRange.top = format.top; }) } }, computed : { sectionBarConfig ( if (this .sectionBarRange.direction === "Horizontal" ) { return { ...this.sectionBar, slideSectionIds : this .slideSectionIds, sectionTitles : this .sectionTitles, docking : "Top" , width : this .sectionBarRange.height, startOffset : this .sectionBarRange.left, endOffset : SLIDEWIDTH - this .sectionBarRange.width - this .sectionBarRange.left, edgeOffset : this .sectionBarRange.top, } } else if (this .sectionBarRange.direction === "Vertical" ) { return { ...this.sectionBar, slideSectionIds : this .slideSectionIds, sectionTitles : this .sectionTitles, docking : "Left" , width : this .sectionBarRange.width, startOffset : this .sectionBarRange.top, endOffset : SLIDEHEIGHT - this .sectionBarRange.height - this .sectionBarRange.top, edgeOffset : this .sectionBarRange.left, } } else { throw new Error ("sectionBarRange.direction is invalid" ) } } } }
上述修改下来是没有问题的。但是作为有点强迫症的人,我最后还是把 sectionBarConfig 的数据模型给修改了,与 sectionBarRange 合并起来,并把 computeProp 工厂里用的函数又重新写了一遍,前端也重新排版了一下。小项目重构起来还是比较方便的。这里就不再重新介绍了。
至此,我们的加载项 Navbar 已经具备基本的功能了。